Friday, June 22, 2007

Marinara Amended

by Brian
This is not a full Recipe Friday today because (1) I don't have the time or inclination to write out a whole recipe and (2) I've been wanting to revisit one of my old recipes anyway.

A long while ago I posted the recipe to a good marinara sauce. Since then I've tweaked it a little to make it a great marinara sauce. So next time you want to make a sauce, follow that recipe, but with the following revisions:
  • Don't even bother with green onions. Use a real onion. And use a whole one, not just a half.
  • Add the sugar earlier: pour it over the onions when they are sautéeing in the oil. The idea is that it will bring out their sugars and sort of half-caramelize them (although you are not using that much sugar, and no butter).
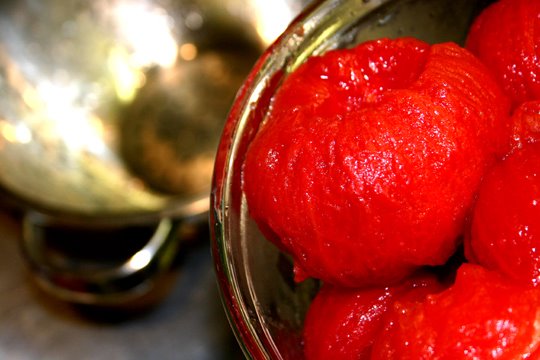
  • Rather than cutting up the whole tomatoes, squeeze them in your hands until they are mashed up. This will require pouring the contents of the can into a bowl, because you probably can't fit your fists into the can. Remember to wash up first.
  • When you add the tomatoes, also add a six-ounce can of tomato paste. This will make the sauce thicker.
I'm really hungry right now. I want this sauce to spring spontaneously from the computer screen and feed me. But that would never happen. Darn reality.

Labels: , ,

Tuesday, January 23, 2007

Mikey's New Crock-Pot

by mike silvers
I love to cook, but I'm not confident enough in the kitchen to make really complicated meals, and I'm getting tired of making the same dishes night after night. (Don't I sound like a voice-over from an infomercial?) So about a week ago, I bought myself a Crock-Pot brand slow cooker.

I don't remember my mom ever cooking with one when I was little, except when she'd make brisket. (Her brisket is to die for, but I can't pass along the recipe.) Anyway, I decided that if I bought one, I could make all sorts of stews and roasts; the hearty kinds of meals that my goyishe friends ate when I was growing up. But where do you find a good recipe for a slow cooker? One of my cookbooks, The New Best Recipe, which I love, features a delicious-looking recipe for French Onion Soup that I plan on making next week, maybe on Sunday. But otherwise, I have to adapt other recipes, or look on the Internet. And my friends, it's slim pickin's on-line.

But this morning, I decided to try out this recipe for Cuban black bean soup from Crockpot.com:

Cuban Black Bean Soup

Ingredients:

3 15-oz. cans black beans, undrained
2 14.5-oz. cans beef broth
1 14.5-oz. can diced tomatoes
1 4-oz. can chopped green chilies
5 oz. extra-lean fully cooked ham, cut into 1 inch cubes
1 cup chopped onion
1/3 cup red wine vinegar
1 tsp dried oregano leaves
1 tsp ground cumin
1 tsp dried thyme leaves
1 tsp pepper

Directions:
Combine all ingredients in stoneware stir well. Cover cook on Low 8 to 10 hours or on High for 4 to 5 hours.


With the soup, I'll also make Brazilian rice, which goes perfectly with black beans. I hate cooking white rice, but you really can't go wrong cooking it the Brazilian way, and it's, well, yum tasty. I learned the recipe from my mom, but it's a pretty standard dish.

Brazilian Rice

Screw an ingredients list. I'm doing it narrative style, baby. So you'll need rice, water, salt, an onion, a clove of garlic, and olive oil. Heat the
olive oil (or EVOO, as Rachael Ray would say) in a frying pan. Mince the garlic, chop the onions, and saute them in the pan until they're golden brown. Pour in the rice and fry it with the onions and garlic until the rice starts to brown. Then add water (you know the rule: about twice as much water as rice) and salt. Cover the pan and let it cook for about 20 minutes.

If you serve this all with a slice of orange, some farofa (manioc flower fried in butter with garlic -- you can substitute
cream of wheat for the manioc), and fried kale, it would be sort of a Cuban take on the Brazilian national dish, feijoada.

I'm not really in the mood for making kale or farofa, so we'll just have the soup and the rice. Feel free to contact me if you're curious to know how it tastes.

Labels: , , , , ,

Monday, January 22, 2007

Turturken

by Brian

It’s a fitting name because it’s similar to turducken but without the duck. And, really, without stuffing whole birds inside other whole birds. There are no whole birds involved. But that’s what makes it easy.

Food you’ll need:
12 ounces chicken- or turkey sausage
1.5 cups pumpkin seeds, shelled (also sold as “pepitas”)
7 tablespoons butter
3 slices turkey bacon
6 ounces ground turkey
1 large onion
1/2 cup grated parmesan or romano cheese
1.5 tablespoons fresh rosemary (or 1/2 tablespoon dried rosemary)
1.5 tablespoons fresh sage (or 1/2 tablespoon dried sage)
3 lightly beaten eggs
1 skinless, boneless turkey breast (sometimes sold as “turkey London broil”)
1.5 cups chicken broth
1.5 cups dry white wine

Tools you’ll need:
Oven
Microwave
Stove
Skillet
Knives
Measuring cups & spoons
Fork
Spatula
Cutting board
Oven mitts and potholders
Casserole dish or roasting pan (about 12” x 9”)
Smaller casserole dish or roasting pan (9” x 9” or 9” x 6”)
Cheese grater (unless your cheese is pre-grated)
Big microwave-safe bowl or dish
Small bowl for beating eggs
Plastic wrap
Meat tenderizer or mallet
Butcher’s twine, skewers, or toothpicks
Meat thermometer
Baster

Preheat the oven to 350 degrees.

In the big microwave-safe bowl, melt one tablespoon of the butter. When it’s melted, arrange the pumpkin seeds (shelled, remember) in the bowl and toss a little to coat them with the butter. Spread them out evenly. Microwave on high for seven minutes, stopping at two-minute intervals to toss them around so they cook evenly.

Lay out your sausages and poke holes in them in a few places with a fork. Then arrange them on your smaller casserole dish and bake in the oven for 15 minutes. Take them out, let them cool, and pump the temperature up to 450 degrees.

Chop the onion, bacon, rosemary, and sage finely. Keep the rosemary and sage separate from the onion and bacon. Obviously skip the rosemary and sage part if you are using dried herbs.

In your skillet over medium heat on the stove, melt the remaining six tablespoons of butter. When it’s liquid, add the onion, bacon, pumpkin seeds, and ground turkey. With the spatula, stir it all up so it is mixed together nicely. Break apart the ground turkey. Let this mixture cook for maybe ten minutes. It’s done when the onions are tender and golden.

Meanwhile, slice the cooked, cooled sausage thinly. If you haven’t already, grate the cheese and beat the eggs.

When the onion-seed-meat mixture is done, remove it from the heat, stir it up, and let it cool.

Lay out your turkey breast on a cutting board. The goal is for it to be big and flat, about a half inch thick all over. It is probably thicker in places at the start, so here’s how to deal with that: Take a big, sharp knife and cut sideways into the thickest part of the turkey, making sure not to cut all the way through. Fold this part over and lay the meat out flat. If there are any other big, thick places that look like they could use the old cut-and-fold, give them the same treatment. Then cover the turkey with a piece of plastic wrap. Wielding the meat tenderizer, whack the meat through the plastic wrap repeatedly, hard, all over, until it thins out to a half inch all around. It might help to stop halfway through and flip it. This takes a little while, but is satisfying in a sadistic way.

Mix the sliced sausage, grated cheese, beaten eggs, and chopped rosemary and sage into the onion-seed-meat mixture, tossing it all around until it is evenly mixed.

Spread this stuffing out over the entire surface of the turkey. If you have some left over, that’s okay. Roll up the turkey, with the stuffing, jellyroll style. This means starting at the bottom of the long end and rolling once, then tucking in the sides, rolling up once more, tucking in the sides once more, and so forth until it is all rolled up. It is okay if the stuffing squeezes out a little bit. Secure the roll together with the twine or with skewers or toothpicks. Put this stuffed turkey in the larger casserole dish or roasting pan and spoon whatever leftover stuffing you have around the outside of it.

Now collect your wine and chicken broth. If you need to make chicken broth, just boil 1.5 cups of water and 1.5 or 2 cubes or packets of chicken bouillon. Pour the broth and then the wine evenly over the turkey into the casserole dish.

Put this in the oven and bake it at 450 for 50 minutes, or until your meat thermometer, properly stuck into the bird, tells you that the internal temperature is at least 165 degrees. At ten-minute intervals while it is cooking, open the oven, suck up some of the juices with your baster, and squirt this over the top of the turkey to keep it moist.

When you take the dish out of the oven, remove the turkey from the dish to a cutting board, remove the skewers or twine and let it cool for ten minutes. Then slice it up and have at it. May I recommend the garlic mashers as a side?

Labels: , ,

Your Basic Marinara Sauce

by Brian

I know how incredibly easy it is to go buy a jar of Prego and serve that with your spaghetti, maybe even throwing it on the stove and adding some spices and various other things, but you still can’t call that sauce your own. You can actually claim this sauce is “from scratch,” and it tastes better than that other stuff to boot.
You’ll need the following potent edibles:

* Four green onions (or half a regular onion)
* Five cloves of garlic
* 1/4 cup extra virgin olive oil (make sure they put that one extra virgin in there)
* 2 – 28 oz. cans whole, peeled tomatoes (or diced tomatoes)
* 2 tablespoons lemon juice
* 1/2 teaspoon sugar
* Some basil, oregano, and parsley

You’ll also need these apparatuses:

* Cutting board
* Sharp knife
* Garlic press, if you got it
* Can opener
* Kitchen scissors
* Large sauce pan (3 quart)
* Measuring cups and spoons
* Skillet
* Stove

Start, as always, but cutting things with knives:

* Wash the green onions. Cut off the white ends and discard them, and then slice the green stalks into hundreds of little thin rings. If you are using a regular white or yellow or red onion, cut it in half, cut off the nasty knob at the end, and chop it up into bite-size morsels.
* Wash and peel (peel and wash?) the garlic, cutting off the tiny nasty ends. If you have a garlic press, push the cloves through it onto your pile of chopped onion. If you don’t, just dice the garlic with the knife into really tiny pieces.
* Open the two cans of tomatoes. If they are diced in the can, stop there. If they are whole, you have to cut them up into smaller pieces. The easier way to do this is with kitchen scissors. Jab the sharp end of the scissors down into the tomatoes and cut, cut, cut. Try to make sure you get all the big pieces.

To the stove!

* Pour the 1/4 cup olive oil into the large sauce pan, and turn the heat up to medium-high. Let the oil heat for a minute or two before adding the onions and garlic.
* Sautee the onions and garlic in the hot oil for a couple minutes until everything is tender. If things start to turn brown, you’ve gone a little too far.
* Now add the tomatoes and stir everything up. Add the lemon juice and sugar and stir things up some more.
* Now add the herbs. How much to add is really subjective. Everything combined equaling 1/3 of a cup, especially if they are dried and crushed herbs rather than fresh, is probably too much. A teaspoon of each is probably too little. Just add whatever makes you feel comfortable.
* Reduce the heat to medium-low, or low, or whatever temperature, after simmering for a few minutes, is enough to make the sauce bubble a bit but not spray all over the place. Let the sauce simmer like this for about thirty minutes, which should be plenty of time to boil water and cook whatever pasta you are serving it with. Leave the sauce uncovered so some of the liquid boils off and it thickens.

Here’s a trick you can use when the pasta is finally cooked and drained:
Spoon several ladles of the sauce into a large skillet over high heat. Then add the pasta and toss it with the sauce for just a minute or two. This makes the pasta taste seven times better for several reasons:

1. The pasta becomes infused with the flavors of the sauce.
2. It prevents the pasta from sticking together.
3. Various other reasons I haven’t thought of yet.

Voila! Another great thing about this recipe is that you can create lots of different variations on the sauce. Add mushrooms if you like mushrooms or peppers if you like peppers. Brown some ground beef and throw that in for a meat sauce. Grill and cut up some sausage to toss in if you’re into that sort of thing. The possibilities, they tell me, do indeed have an end, but it’s so far down the line you wouldn’t notice.

Labels: , ,

Not Your Lunchlady's Sloppy Joes

by Brian
You’ll need the following tools:

* Big skillet
* Toaster (oven)
* Stove
* Spatula
* Sharp, but not too big, knife
* Cutting board
* Can opener

And you’ll need the following food-type items:

* 1 pound lean ground beef
* 1 - 7.5 oz can tomatoes, diced (you can get them bigger then diced, then use kitchen scissors to cut them up in the can if you want)
* 1 medium-sized onion
* 1 green pepper
* Chili power
* Worcestershire sauce
* Quick cooking oatmeal (plain)
* Tabasco sauce
* Hamburger buns

Begin the preparations:

1. Clean the onion and green pepper.
2. Stand the green pepper on end on the cutting board. Insert your knife into the top, pushing all the way through to the bottom. Cut a circle around the stem and push or pull out the core and all its seedy whiteness. Compost that bugger.
3. Slice the remaining hollow cylinder of green pepper in half, then into quarters. Then take one quarter and slice it into strips about 1/4” thick. Pinch all those strips together and slice them cross-ways so they end up little tiny pieces. Do the same with the other three quarters of the pepper.
4. For the onion, slice off each nasty end and peel off all the papery covering. Sometimes it helps if you make a superficial cut in the covering, which gives you an edge to peel. Once you have the naked onion, cut it up into pieces about as small as the green pepper pieces, or as small as you can get without crying.

Now, you have to look in your heart and ask yourself a question: is the ground beef I am going to use frozen?

* If you’re using non-frozen ground beef, throw it in the skillet along with the green pepper and onion pieces. Then brown it over medium heat. What does browning mean? We’ll get there in a second.
* If you’re using frozen ground beef, it’s going to take a little while to brown it, so put it in the skillet but leave the onions and green peppers out until you are about halfway done.
* Browning ground beef basically means breaking it up into tiny pieces with the spatula while you are cooking it. You know you’re done browning when the meat is, oddly enough, brown. At that point, you can say to yourself, Well done, Brownie, you’re doing a great job.
* If the meat is a frozen hunk when you start, you can still brown it, but it takes a little longer. Put it in the skillet until one side starts sizzling. Then flip it over and use the spatula to scrape off the partially cooked meat on that side—basically, scrape off whatever you can. By the time you are done, it should be just about time to flip it back over and do the same to the other side. Keep doing this until there is no frozen meat left and it all just breaks up into tiny pieces for you. But don’t forget to add the onions and peppers halfway through.

Now what?

Once you’ve got the ground beef all browned, and the onions and peppers have been in there a little while and it’s all simmering, you’ll want to ask yourself, how much grease is in that pan? If it looks like a lot, you’ll have to drain it out. This is a complicated maneuver which involves putting a lid on the pan, lifting the pan by the handle, then holding it sideways over a can or bowl or something with one hand on the lid handle, so that grease can run out the bottom into the can, but you don’t let any of the food fall out. If you used lean enough ground beef in the first place, you probably don’t have to drain it at all.


Put it back uncovered on the burner, if you took it off, and then add the following:

* 7.5 ounces of diced canned tomatoes
* 2 tablespoons chili powder
* 2 tablespoons Worcestershire sauce
* 2 tablespoons oatmeal
* Some Tabasco sauce (your call)

Mix it all up with your spatula, and then reduce the heat to low-medium. This is one of those “it’ll be done when it is done” sort of things—you have to just watch it, stirring it up occasionally, and then eventually decide, okay, it’s time to eat this. Maybe it’ll take five minutes, maybe eight, maybe twelve: I don’t know. You can’t really mess it up.

Toast your buns in the toaster oven. No, your hamburger buns. When they are done toasting, and your meat is done roasting, and you are nearly done boasting, stick the buns on a plate, slap some sloppy joe on there, and eat away. Goes great with Jell-O.

Labels: ,

Thai Lemon Beef

by Brian
You’ll need:

1 boneless top round steak or flank steak

1/3 cup of soy sauce

1/4 cup of lemon juice

1/4 cup of water

3 teaspoons crushed red pepper (like the kind you get at pizza places—a few packets of the free stuff from Pizza Hut would work)

4 cloves of garlic

1 tablespoon of vegetable oil

4 green onions

2 carrots

2 teaspoons cornstarch

1 cup of rice


Heavy artillery:

Sharp knives

Measuring cups and spoons

Large bowl or Tupperware container

Big skillet or wok (nonstick)

Spatula

Garlic press, if you got it

Whisk (or a fork, the poor man’s whisk)

Medium sauce pan

Cutting board

Refrigerator

Stove

Time to do some pre-cutting:

Peel and mince the garlic (or press it)

Cut the green onions into 2” pieces

Peel the carrots and slice them as thinly as possible

Cut the steak diagonally (that is, at like a 60 degree angle to the floor) across the grain (usually means width-wise) into 1/8 in strips, then place it in your large bowl

Now to make the marinade:

Combine soy sauce, lemon juice, water, crushed red pepper, and garlic. Pour half of it over the steak, and keep the other half. Cover the steak and stick it in the fridge for at least half an hour. My theory is, the longer you marinate, the better, but you probably don’t have time to wait all day.

Rice is a separate issue:

You’re going to cook the rice according to the instructions on the package, which probably means boiling it in a specific amount of water for like half an hour or something. The tricky part is timing. You want to have the rice done at about the same time, or slightly before, the steak, which will take about ten minutes to finish once you are done marinating it. So start the rice an appropriate amount of time before you take the steak out of the fridge.

Ready to take the steak out and get this show on the road?:

Drain the steak and throw that marinade away (remember, you kept the other half of it). Put your big skillet or wok on the stove over medium-high heat, and heat 1/2 tablespoon of oil in it. Put half of the steak in the skillet and stir-fry it a minute or so, until it’s a color darker and browner than pink. Then take that steak out and start the process over again with new oil and the remaining steak, which you will then pull out.

Now put the green onions and carrots in the skillet and stir-fry them for three minutes.

Meanwhile, whisk (or fork) the cornstarch into the marinade that you saved. After the three minutes is up on the veggies, add this cornstarch marinade to the skillet and continue stir-frying until it gets thick.

Your rice should be done or almost done. Just making sure.

Finally, add all the steak to the skillet. Just keep stir-frying until everything is heated.

Great, you’re done. Put some rice on a plate and pour the steak over the top of it. As they say in Thailand, bon appetít!

Labels: ,

Las Quesadillas Locas

by Brian
Sticking with the Mexican theme today. You'll need:
2 flour tortillas (okay, this is going to sound disgusting, but if you can find them, get the kind made with lard rather than shortening--they are soooo much better tasting and authentic)
Some butter
Couple fistfuls (about 1/2 cup, maybe) of shredded mexican cheese (monterey jack works well, or cheddar--they have these bags of shredded mexican blend in the dairy section that will work just fine)
Two tablespoons of salsa (the hotter the better)
Little bit of garlic powder

As far as hardware goes, you'll need:
A griddle or big skillet
A spatula
A butter knife
Maybe a cheese grater, if you don't get the pre-shredded cheese
A spoon

Lay out your two tortillas and butter one side of each. Then flip them over, butter side down.
Spread the shredded cheese over one of the tortillas until it's about a quarter inch thick all around.
Spoon some salsa on the top of the cheese.
Sprinkle with a little garlic powder.
Put tortilla number two on top with the butter side out (so now you've got cheese and salsa sandwiched between two tortillas, with butter on the top and bottom of the sandwich).
Stick the quesadilla on the griddle and turn the burner up to medium. Once it starts cooking, use the spatula to lift up the bottom tortilla so you can check its color. When it's golden brown, flip the quesadilla over. Then cook it until the bottom side is golden brown too. The cheese will melt and mix with the salsa.

And boom, you have yourself a quesadilla.

Variation: Las quesadillas locas con el pollo que es el mas maravilloso del mundo

To mix it up a little, you can add chicken to your quesadillas. Take a skinless boneless breast and stick it on a George Foreman grill for about nine minutes. Then slice it into strips. Put the chicken strips on the quesadilla right after the salsa and then follow the rest of the directions the same way.

Labels: , ,

Pollo Relleno

by Brian
(it's Spanish for stuffed chicken)

This tastes really good. It's like a cross between Chicken Kiev and Chicken Parmesan, but Mexican. And it's easier than it sounds. Never stuffed anything before? Well, this is more like rolling. And we know you can do that.

Ingredients:

2 skinless, boneless chicken breasts (they tell me you can skin and bone your own, but why bother?)
1/2 cup cornmeal
1/2 tablespoon regular, all-purpose flour*
1/2 tablespoon dried minced onion (or mince your own - mincing means chopping as finely as possible)*
1/2 teaspoon beef bouillon granules*
1/2 teaspoon garlic salt*
1/2 teaspoon ground cumin*
1/2 teaspoon paprika*
1/2 teaspoon chili powder*
1/4 teaspoon onion salt*
1/8 teaspoon cayenne pepper*
[if you're really feeling lazy, you can substitue 1/2 of a 1.25 oz. package of taco seasoning from the store, which you can find with all the Mexican foods, instead of everything marked with an asterisk*]
2 roasted peppers (they come in a jar in juice/water/oil - pick whichever color and level of hotness you want or can find).
1 block of Monterey Jack cheese (cheddar is okay, but monty jack is so much better. If you have some on hand, you just need enough for four 2" x 1/2" x 1/2" boxes with a little left over for shredding)
2 tablespoons cilantro (fresh and chopped is best, but out of a little spice jar will do just fine)
1/4 teaspoon crushed red pepper (or one packet of the red peppers that come with pizza)
1 egg
Some salsa

Other stuff you will need:
A sink
Paper towels
A sharp knife
A cutting board
Some plastic wrap
A meat tenderizer/mallet or rolling pin
Two bowls
Baking pan (13" x 9" x 2" is a good size, but close will work)
Oven
Sense of purpose

Preheat the oven to 375 degrees.

Rinse the chicken under running water, then pat it dry with a paper towel. Put it on the cutting board and slice all the disgusting pieces of fat off it. It's too hard to get all of them, but get what you can. Then open them up so they are sort of splayed apart and slice them in half. They have a sort of natural seam down the middle, but usually there is a big half and a small half on either side of this seam, so you'll probably have to slice a little to the big half side of the seam to make each side roughly equal. Now you have four skinless, boneless, chicken breast halves.

Take out the plastic wrap and cut off two square pieces (as long as the wrap is wide). Place one of your chicken breast halves between them and start smacking it with your mallet or rolling it with your rolling pin. Try to flatten it out to a rectangle or circle about 1/4"-1/8" inch thick. Get it as thin as you can without it being so thin it falls apart. Then set it aside and do the same with the other three breast halves.

Take out the cheese and cut off four boxes that are 2" x 1/2" x 1/2". Also take out your two peppers and scrape out whatever seeds are hanging on. Cut them in half lengthwise.

Place one pepper half on top of each of the flattened breast halves. Then place one cheese block widthwise sort of near the bottom end of each breast half, kind of in the same orientation you would use for the stuff that goes in a burrito. Sprinkle each of the chicken-pepper-cheese stacks with the cilantro and the red peppers. Then roll up each one like you would a burrito - bottom first, over the cheese, then sides in, then roll up to the top. Shred some more of the cheese.

Now crack your egg into one of your bowls and beat it lightly. In the other bowl, mix the corn meal and all the asterisk taco seasoning ingredients. Set up the two bowls and the empty baking pan as an assembly line, in this order: egg bowl, taco seasoning bowl, baking pan. Now take a chicken roll and dip it in the egg, making sure to cover every outer surface. Then dip it in the taco seasoning, again making sure to cover every outer surface. Then place it with the seam down on the baking sheet. Do the same for the other three chicken rolls.

Place the baking sheet in the middle of the 375 degree oven and bake for 25-30 minutes. You'll know when it's done because you'll cut into the thickest part of the chicken a little bit and you won't see any pink--it'll be white as far as the eye can see. As soon as you take them out of the oven, put the shredded cheese on top of them, then a gob of salsa.

Serve with some refried beans (easy to get in a can and then just heat up) and your favorite kind of salad.

Labels: ,